Ever wondered how I film my sewing videos for Instagram and YouTube? I don’t have a huge studio, just a simple setup that fits my needs.
In this post I’ll share the exact equipment I use, my go-to iPhone camera settings, and the simple lighting setup that makes everything look bright and clear. Whether you’re filming tutorials, reels, or just sewing content for fun, here’s the behind-the-scenes of how I create polished videos from home.
1. iPhone camera settings
When I first started filming sewing content, the temptation to upgrade to a new iPhone was SO real. Everyone’s reels looked glossy, and mine… not so much. (For reference, all my reels and YouTube tutorials are filmed on an iPhone 12 Pro that’s barely hanging on).
What helped was discovering the right iPhone camera settings. With just a couple of changes, my video quality improved straight away! No new phone needed.
Recommended filming settings:
- Film in 4K at 60 FPS (frames per second)
- Turn Smart HDR and HDR video off

2. Tripods
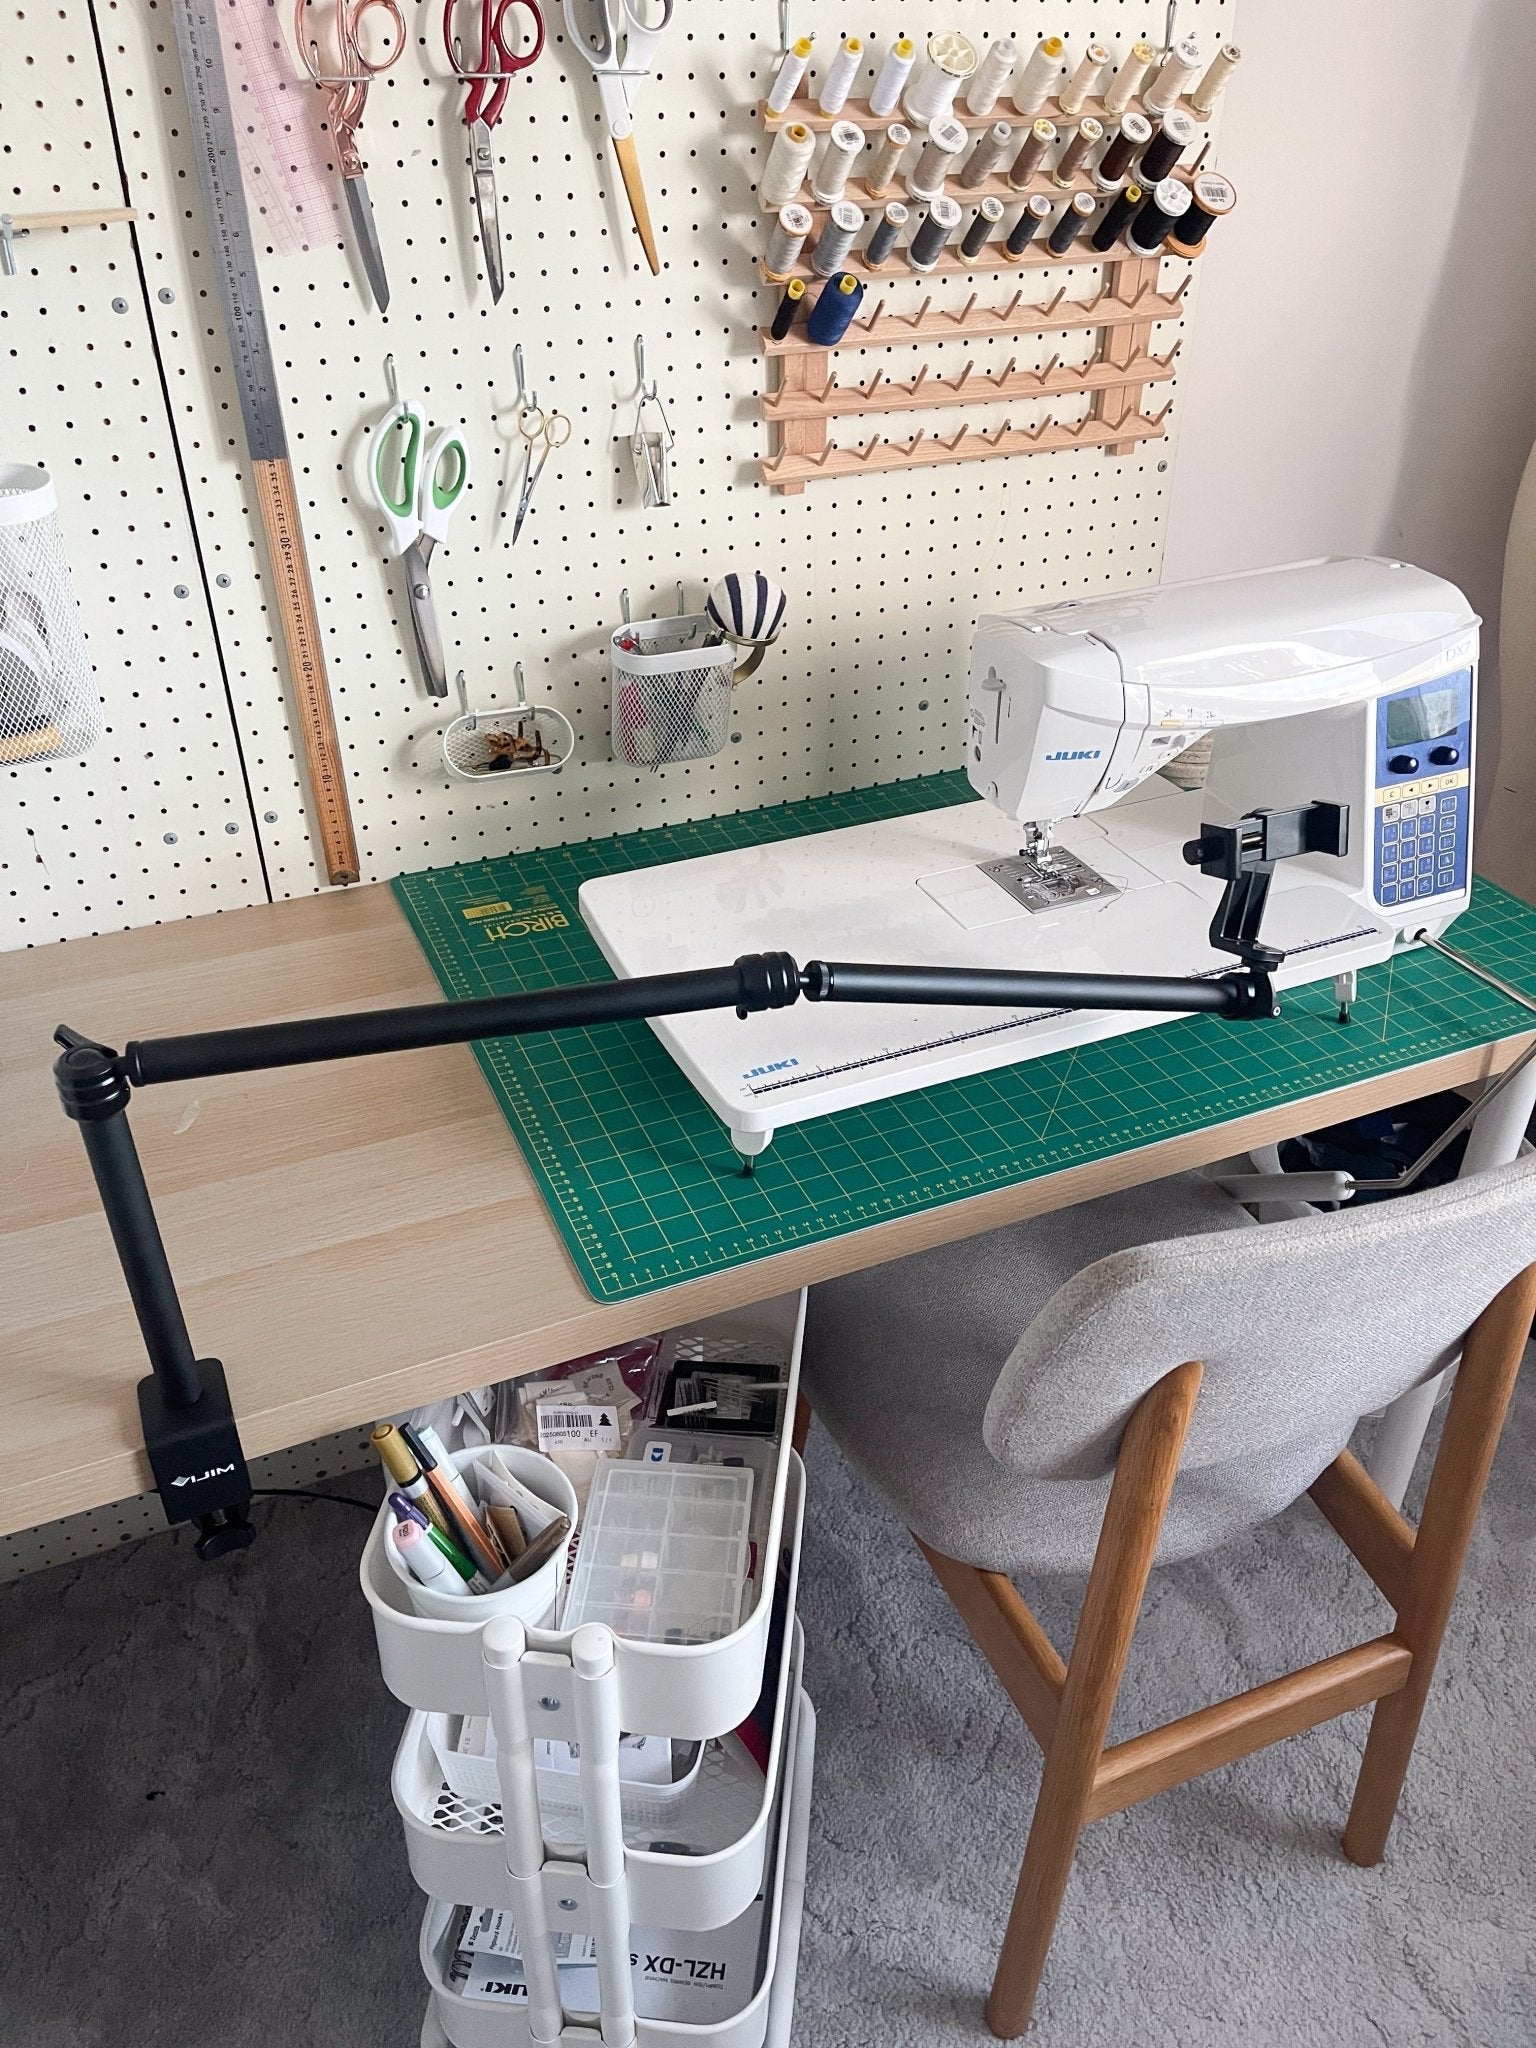
Tripods are the real MVP of my filming setup. They let me sew hands-free and capture a range of angles, which is important for giving my followers and customers the best tutorial possible!
My setup includes three tripods:
- Clamp tripod at the sewing machine – Allows for close-ups without bumping into tripod legs.
- Clamp tripod at the cutting table – Perfect for getting the distance required for wide, bird's eye angle shots.
- Standing tripod – A “floater” for close-ups, ironing board shots, and random angles.
Each tripod also has its own phone bracket, which saves a heap of time when switching between angles.
For those filming with both a phone and a camera, a dual mount is also really handy. This allows you to attach both to one tripod!
Tripod setup includes:
- 2 x clamp tripods
- 1 x standing tripod
- 3 x phone brackets
- 1 x dual mount
All of these can be found on my Amazon sewing finds page.


3. Lighting
Lighting is easily the trickiest part of filming sewing content. Natural daylight is best, but it isn’t always reliable, especially in winter.
Here’s how I tackle it:
Plan A: Natural light boost
When there’s enough daylight but shadows need softening, I set up an LED light stand (turned off) and hang a golden reflector from it. (You can also use a reflector stand for this, I just use what I have available!)
Plan B: Low light backup
When there isn’t enough natural light, I switch on two LED lights. Using a pair helps balance shadows, and I like these because the yellow and white balance can be adjusted to mimic daylight as closely as possible. That said, I never film in complete darkness or really low light – there’s only so much these LEDs can fix.
Lighting setup includes:
- 2 x LED lights
- 1 x reflector
- Hooks
Everything here is also on our Amazon sewing finds page.


Final thoughts
That’s my full filming setup – a few tweaks to iPhone settings, some trusty tripods, and lighting that works with (or against) the weather.
It’s been a process of trial and error, but investing in a few key pieces has made filming far easier and more enjoyable. Hopefully, this gives you a starting point for building your own setup.


